This website uses cookies to ensure you get the best experience on our website. Learn more
How To make Jello Rainbow Cake
1 pk White cake mix
2 pk Jello (3 oz) any flavor
2 c Boiling water
1 pk Cool whip, thawed (8 oz)
Bake cake mix as directed on package. Remove from pans to cool. Rewash pans and put cakes back in them when the cakes are completely cooled. It is best to use 2 8-9" round cake pans but you can use an oblong pan if you want. After cakes have been place back into pans (top side up), prick them with utility fork at 1/2" intervals. Meanwhile, dissolve each flavor separately in 1 cup boiling water. Carefully pour one flavor gelatin over each cake layer (if using oblong pan you must use the same flavors for the 2 pks). Chill 3-4 hours. Dip one cake pan in warm water for 10 sseconds, then unmold cake layer onto serving
plate. Top with about 1 c. cool whip. Unmold second cake layer and carefully place on first layer. Frost with remaining topping. Chill. Great moist'n fruity cake especially for those who like a light, refreshing cake that is not too sweet.
How To make Jello Rainbow Cake's Videos

Easy Strawberry Jello Poke Cake - So Delicious!
Looking for an easy strawberry cake for summer? This Easy Strawberry Jello Poke Cake is delicious and so simple to make with only 5 ingredients including fresh strawberries, a white cake mix, strawberry jello mix, water, and whipped cream topping. Grab some strawberries and try this easy jello poke cake today!Thanks so much for watching today’s video! If you love it, don’t forget to “LIKE”, leave a sweet COMMENT, and SUBSCRIBE for weekly recipes❤️
⬇⬇⬇ GET FULL RECIPE BELOW ⬇⬇⬇
MORE EASY CAKE RECIPES TO WATCH:
Hawaiian Pineapple Coconut Poke Cake:
Banana Pudding Poke Cake:
Crushed Pineapple Upside Down Cake:
Best Sock It To Me Cake:
Easy Strawberry Jello Poke Cake Ingredients:
▪️ 1 15.25 oz boxed white cake mix (prepared with ingredients as box directs)
▪️ 3 oz boxes of strawberry jello
▪️ 1 1/2 cups boiling water
▪️ 1 cup cold water
▪️ 8 ounces whipped cream (homemade or cool whip)
▪️ 1 1/2 cups fresh strawberries, diced or sliced
▪️ 1-2 tsp for sweetening strawberries (optional)
KITCHEN TOOLS USED (affiliate):
▪️ Strawberry Hull and Slicer:
▪️ Glass 9x13 Baking Dish:
▪️ Electric Mixer:
▪️ Glass Mixing Bowl:
▪️ Silicone Spatula:
▪️ Wooden Spoon (for poking holes):
▪️ Measuring Cups:
▪️ Magnetic Measuring Spoons:
▪️ Wire Cooling Rack:
▪️ Cake Icing Spatula:
▪️ Plastic Wrap:
CARA’S KITCHEN ESSENTIALS (affiliate):
▪️ Hand Mixer:
▪️ Stand Mixer:
▪️ Glass Mixing Bowls:
▪️ Measuring Cups:
▪️ Magnetic Measuring Spoons:
▪️ Favorite Non-Stick Spatulas:
▪️ Go-to Cookie Scoops:
▪️ Pre-Cut Parchment Paper:
▪️ Baking Sheets:
FOLLOW ME:
▪️ BLOG:
▪️ INSTAGRAM:
▪️ FACEBOOK:
▪️ PINTEREST:
▪️ BEAUTY YOUTUBE:
▪️ BEAUTY INSTAGRAM:
For brand inquiries or sponsorships, please contact me at kindlyunspoken22@gmail.com
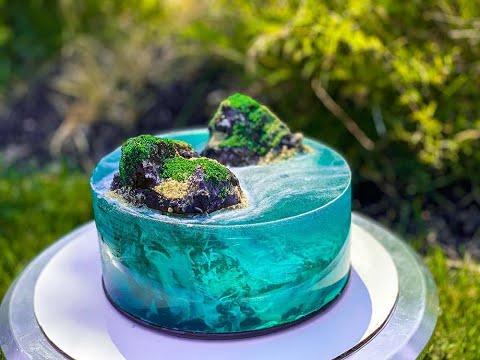
ISLAND CAKE TUTORIAL| OCEAN JELLY | JELLO CAKE| CAKE TRENDS 2020
Hi!Welcome to my channel.Here is a beautiful jelly cake island idea to impress your loved ones. More Ocean? Beach cake ideas :************************************************************************************************
1. I have used 3 layers of 6 Chocolate cake and sandwiched them with chocolate Ganache.
2. Used cake cutoffs mixed with ganache to get the shape of mountains.
3.Covered the cake with chocolate ganache.
4.Applied some melted white chocolate for the bottom of the cake
5.Painted the cake with white gel coloring mixed with Vodka.You can use lemon extract instead.
6.7.Put the cake in the fridge, chill.
8.Mix 120 g of gelatin with 1.5 cups-of cold water and let it sit for 15 minutes.
9.Boil 150g sugar with 600ml water
10.Add 2 tablespoon of lemon juice
11.pour Hot water over the bloomed gelatin and stir very well,
12.Add a drop of blue food coloring and mix
13.Put the cake on a 7 springform pan and sealed it well with plastic wrap and tape.
14.Got a 4 tall acetate sheet And sprayed it with oil
15.Wrap up the cake with acetate sheet.
16.Finally add gelatin mix Slowly
17.Used Crushed Marie cookies for the moss.Color the cookies with two shades of green,
18.Put it on top of the mountains.
19.Used white gel coloring to get the wave effect.
Ganache recipe:
8oz/160 g semi sweet chocolate chips
1/2 cup whipping cream
I doubled this recipe
~~Products used in this video ~~
Acetate Sheet :
Springform pan (7) :
Americolor White Gel color :
Food safe Cake painting brushes :
semi sweet chocolate chips :
Knox Unflavored gelatin :
White chocoalte chips :
Goya Maria cookies :
Revolving cake stand :
Subscribe to my channel!! ➤
FOLLOW ME
❤️ FACEBBOK
DISCLAIMER: These are affiliate links, which means that if you click on one of the product links and buy something, I’ll receive a small commission with no additional cost to you. This help support the channel and allows me to continue to make videos like this. Thank you for the support!
***************************************************************************
tradução para português usando o google tradutor. por favor, desculpe qualquer erro
Eu usei 3 camadas de bolo de chocolate de 6 e as coloquei com ganache de chocolate.
Recortes de bolo usados misturados com ganache para obter a forma das montanhas.
Cobriu o bolo com ganache.
Aplique um pouco de chocolate branco derretido no fundo do bolo
Pintou o bolo com coloração de gel branco misturado com vodka
Coloque o bolo na geladeira, leve à geladeira.
Misture 120 g de gelatina com 1,5 xícaras de água fria e floresça por 15 minutos.
Ferva 150g de açúcar com 600ml de água
Adicione 2 colheres de sopa de suco de limão
despeje água quente sobre a gelatina florescida e mexa muito bem,
Adicione uma gota de corante azul e misture
Coloque o bolo em uma forma de mola de 7 e sele-o bem com filme plástico e fita adesiva.
Tem uma folha de acetato de 4 de altura E pulverizou com óleo
Enrole o bolo com uma folha de acetato.
Por fim, adicione a mistura de gelatina lentamente
Use cookies esmagados Marie para o musgo.Color os biscoitos com dois tons de verde,
Coloque no topo das montanhas.
Cor branca em gel usada para obter o efeito de onda.
************************************************************************************
Song credits to :
► Jarico - Landscape :
► Jarico - Landscape [NCS BEST OF]:
-~-~~-~~~-~~-~-
Please watch: WEDNESDAY ADDAMS Dress CAKE | Rave N Black dress cake
-~-~~-~~~-~~-~-

Layered Christmas Jello
RECIPE:
How to Make Rainbow Jelly Cake Tutorials | The Best Jelly Cake Recipes You'll Ever Try
▽ Subscribe here:▽ How to Make Rainbow Jelly Cake Tutorials | The Best Jelly Cake Recipes You'll Ever Try
This Rainbow Jelly Cake is So Good, You'll Wonder Why You Haven't Tried It Before
▽ Watch More Playlist:
➞ So Tasty Official:
➞ Yummy Cake:
➞ Dessert Recipes:
➞ Colorful Cake:
▬▬▬▬▬▬▬▬▬▬▬▬▬▬▬▬▬▬▬▬▬▬▬▬▬▬▬▬▬▬▬▬
▽ About So Tasty: We bring you easy how-to videos showing you some of the worlds tastiest cakes, ranging from DIY chocolate, cupcakes, drip cakes, icing cookies and much more!
Thanks for watching, and welcome to our tasty world!
▽ Don't forget to turn on notifications, like, & subscribe!
▽ All visual content in this channel is owned by YumUp. For any inquiries, please reach out to Contact@yumup.net.
#SoTasty, #SoTastyCake, #TastyCake, #yumupcake

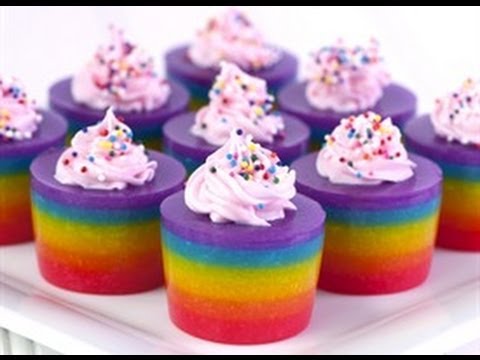
Rainbow Jello | Colorful | Melts In Your Mouth | SIMPLE SNACK | Perfect For Parties
Published September 15, 2021This is a delicious gelatin dessert that everyone will love. It has 8 jiggly layers of colorful and tasty jello and condensed milk. Time consuming but simple to make. Great to have children help. Allow several hours to make but the results are fantastic and the squares will disappear fast.
If you're in Oahu, Hawaii or Las Vegas, Nevada be sure to check out my PICKLE PASSION COOKBOOK in the library!
Visit my website to get complete ingredients and directions:
Https://HawaiisPickleLady.com
You can find this recipe under Desserts.
My You Tube Channel:
Https://youtube.com/c/HawaiisPickleLady
Follow Me on TikTok:
tiktok.com/@hawaiispicklelady
Follow Me On Instagram:
Https://instagram.com/picklepassion808
Follow Me On Facebook:
Https://facebook.com/leonora.ching.9
If anyone has made this please post in Facebook.
If you would like me to make something please let me know in the comments.
Relevant Articles
-
 Rainbow Jello
Desserts -
 Jello Cake
Cake -
New Jello Cake
Cake -
 Rainbow Ice Cream Cake
Cake -
 Patriotic Jello Cake
Baked Goods -
Jello Flavored Cake
Cake -
Lemon Jello Cake
Cake -
Orange Blossom Jello Cake
Baked Goods -
Whipped Jello Cake .. Magazine
Cake -
Pop Cake (Jello Cake) Krvd70b
Cake -
How To Make Gravy
Chicken -
Make Their Own Pizza
Main Dish -
How To Make Tofu
Beans and Grains -
Rainbow Holiday Cup
Fruits -
Rainbow Cookies
Baked Goods -
Easy To Make Bars
Candies -
Make Ahead Hot Cereal
Breakfasts -
Easy To Make Brownies
Nuts -
Make Ahead Gazpacho
Mexican -
POTATO SALAD ALMOST LIKE MOM USED TO MAKE
Salad
Categories
- Appetizers
- Baked Goods
- Barbeque
- Basics
- Beans and Grains
- Beef
- Beverages
- Breads
- Breakfasts
- Cake
- Candies
- Canning and Preserving
- Casseroles
- Cheese
- Chicken
- Chocolate
- Condiments
- Cookies
- Crock Pot
- Desserts
- Duck
- Eggs
- Fruits
- Grains
- Herbs and Spices
- Holiday
- Hot and Spicy
- Jellies and Jams
- Kids
- Lamb
- Liquor
- Main Dish
- Mexican
- Nuts
- Pasta
- Pets
- Quick and Easy
- Recipes for Pets
- Regional Cuisine
- Rice
- Salad
- Sauces
- Sausages
- Seafood
- Side Dish
- Snacks
- Soups
- Stews
- Stuffings
- Sweets and Desserts
- Vegetables
- Vegetarian
- Wild Game