This website uses cookies to ensure you get the best experience on our website. Learn more
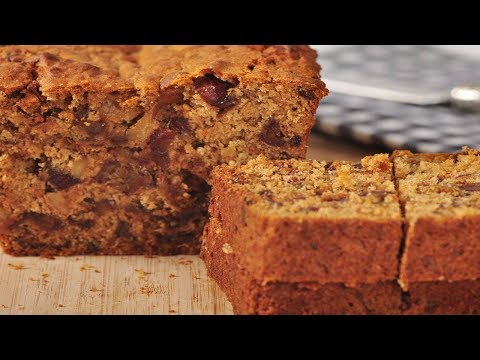
How To make Cherry Nut Bread
1 c Brown sugar
1/4 c Margarine
1 ea Egg
2 c Flour
2 t Baking powder
1 t Salt
1 cn Dalton cherries small jar
1/2 c Walnuts
cream sugar & margarine. add egg, sift flour baking powder and salt. In cup put juice of cherries and fill cup with milk. Add milk mixture alternately with flour adding cut up cherries & nuts with each portion of flour. Bake in 350 F oven in loaf pan 1 hour or until toothpick comes out clean.
How To make Cherry Nut Bread's Videos

Cherry Nut Cake

Date Walnut Bread Recipe Demonstration - Joyofbaking.com
Recipe here: Stephanie Jaworski of Joyofbaking.com demonstrates how to make Date Walnut Bread. Date Walnut Bread is a very nice tea bread bursting with the flavor of sweet dates and crunchy walnuts. The first recipes for this bread began to appear in the 1920s, and it was so popular in the 1930s that it was used to make tea sandwiches. In fact, these tea sandwiches are so delicious you may want to try them. Take two thin slices of your Date and Walnut Bread and sandwich them together with a layer of cream cheese or butter. Then cut the bread into fingers, squares or triangles.We welcome questions on our Facebook Page:
Baking banana-nut-cherry bread!
Hello friends! Thought I would take you along while I baked today. Hope you enjoy it and if you do give me a thumbs up and leave a comment. Thanks in advance. God Bless.
Cranberry Nut No Knead Bread | Sally's Baking Recipes
This cranberry nut bread means yeasted bread has never been easier. This simple mixing method produces the most beautiful and crusty bread with practically zero hands-on work!Get the full recipe:
• Ask your recipe question or leave a review over on the recipe page.
#baking #recipes #nokneadbread
• More of Sally's baking recipes:

Delicious Cherry Nut Cake! Reminiscent of a wedding cake!
Delicious Cherry Nut Cake! Have you ever had a cherry nut cake at a wedding (possibly your own) and loved it? This delicious cake will wow your guests and family members, and it's reminiscent of a traditional wedding cake! The combination of nuts and cherries make each bite wanting more of this delectable dessert. You can opt to frost or glaze the cake, or dust it with powdered sugar. It's delicious on its own too! Give this recipe a try. You won't be disappointed! Peace Love And Tasty Eats!Cherry Nut Cake
Preheat oven 350° F
Grease and flour a 10-inch tube pan
Ingredients:
3 cups flour
1 teaspoon baking powder
1 teaspoon baking soda
pinch of salt
2 cups sugar
2 sticks (1/2 lb) unsalted butter, softened
2 teaspoons vanilla extract
2 teaspoons almond extract
3 eggs
8 ounces (1 cup) sour cream
1 cup (16 oz jar) maraschino cherries, drained and cut into halves
1 cup chopped nuts
Baking in a convection oven will take only 35-40 minutes until done, a conventional oven may take 60-75 minutes.
Enjoy!
-- If you'd like to stock your kitchen with items (or similar) used in this video, they can be found by clicking on the links below. Thanks for checking them out! :)
KITCHENWARE -
*Pyrex Glass Mixing Bowl Set - 3pcs:
*Measuring Spoons - Stainless Steel - 4pc:
*Whisk Mixing Set - 3pcs:
*Stoneware Mixing Bowl Set - 4pc:
*Glass Mugs With Handle - 16 oz - Set of 6:
*Spatula Set - 4pc:
*Electric Hand Mixer:
*Tube Baking Pan:
*Oven Mitt And Pot Holder Set:
*Clear Glass Cake Serving/Display Plate:
*Cake and Pie Server/Cutter:
*Glass Dessert Plate - Set of 6:
FOOD -
*Vanilla Extract:
*Almond Extract:
*As an Amazon Associate I earn from qualifying purchases
Relevant Articles
-
 Make Ahead Monkey Bread
Breakfasts -
 Cherry Yogurt Bread For Bread Machine
Breads -
 Cherry Bread
Breads -
 Cherry Bread Pudding
Eggs -
 Festive Cherry Bread
Baked Goods -
 Chocolate Cherry Bread
Chocolate -
Cheery Cherry Bread
Baked Goods -
Cherry Cheddar Bread
Breads -
Fresh Cherry Bread
Baked Goods -
Mama's Cherry Nut Bread
Baked Goods -
Cherry Sweet Potato Bread
Baked Goods -
Quick And Easy Cherry Bread
Fruits -
Quick& Easy Cherry Bread
Baked Goods -
Cheery Cherry Bread Crockpot
Main Dish -
Make Their Own Pizza
Main Dish -
How To Make Gravy
Chicken -
How To Make Tofu
Beans and Grains -
POTATO SALAD ALMOST LIKE MOM USED TO MAKE
Salad -
Make Ahead Gazpacho
Mexican -
Easy To Make Brownies
Nuts
Categories
- Appetizers
- Baked Goods
- Barbeque
- Basics
- Beans and Grains
- Beef
- Beverages
- Breads
- Breakfasts
- Cake
- Candies
- Canning and Preserving
- Casseroles
- Cheese
- Chicken
- Chocolate
- Condiments
- Cookies
- Crock Pot
- Desserts
- Duck
- Eggs
- Fruits
- Grains
- Herbs and Spices
- Holiday
- Hot and Spicy
- Jellies and Jams
- Kids
- Lamb
- Liquor
- Main Dish
- Mexican
- Nuts
- Pasta
- Pets
- Quick and Easy
- Recipes for Pets
- Regional Cuisine
- Rice
- Salad
- Sauces
- Sausages
- Seafood
- Side Dish
- Snacks
- Soups
- Stews
- Stuffings
- Sweets and Desserts
- Vegetables
- Vegetarian
- Wild Game