This website uses cookies to ensure you get the best experience on our website. Learn more
How To make Cafe Au Lait Cheesecake
Dorothy Cross- TMPJ72B
CRUST:
2 cup Butter cookie crumbs1/4 cup Sugar
6 tablespoon Sweet buuter
soft
:
FILLING 3 tablespoon Unflavored gelatin
1/2 cup Cold water
3 Eggs :
separated 1/2 cup Sugar
1/2 cup Light cream
1 1/2 pound Cream cheese
softened
1 teaspoon Vanilla
1 cup Heavy cream
2 teaspoon Coffee liquer
2 tablespoon Instant coffee :
dissolved in 3 tablespoon Hot water
Use a 10 inch springform pan.
CRUST:
In a medium-sided bowl, combine the butter cookie crumbs, sugar and butter. Blend well with fingers, fork or pastry blender. Press or pat the mixture onto the bottom and sides of a well-buttered springform pan. Chill in the freezer or frigde for about 30 minutes.
FILLING:
Soften the gelatin in the cold water.
In a small saucpan, combine the egg ylks and sugar and gradually stir in the light cream. cook the mixture over medium heat, stirring, until it coats a metal spoon. Remove from the heat and stir in the softened gelatin.
Beat the cream cheese until very smooth and creamy, then add the vanilla and continue to beat until very smooth and creamy. Add the gelatin mixture to the cheese mixture and beat until smooth.
Chill in the refrigerator for 30 minutes or until the mixture is set.
In separate small mixing bowls, whip the heavy cream and beat the egg whites until stiff, then fold both into the cream cheese mixture.
In a small saucepan, heat the instant coffee dissolved in water, and the coffee liquer, stirring until smooth. Add the coffee mixture to the cheese mixture and beat until very smooth and creamy.
Pour into the chilled springform pan and refrigerate for 3 hours, or until cake is set and firm. Carfully remove the sides of the springform pan, transfer cake to a serving dish, and serve.
How To make Cafe Au Lait Cheesecake's Videos

Café au Lait Cheesecake | Valentin'es Day Desserts
Valentine’s wouldn’t be complete without a decadent chocolatey dessert. We’re pulling out all the stops with this double layer cheesecake. While it may seem overwhelming, none of the steps requires much skill to complete. A bit of patience and steady hand will produce beautiful and delicious results. Don’t skimp on the crust. It’s easier than you think. Just be sure to press it firmly to the sides and bottom.Café au Lait Cheesecake
9 ozs., 255g, chocolate wafers (not cream filled cookies) such as Nabisco Famous Chocolate Wafers
½ cup, 113g, butter, melted
2 ozs., 57g, bittersweet chocolate 60% cacao
2 tablespoons, 30ml, water
1 tablespoon, 6g, instant espresso
2 tablespoons, 30ml, coffee liqueur, or water
24 ozs., 680g, cream cheese, softened
1 cup, 230g, white sugar
2 tablespoons, 22g, flour
1 teaspoon, 5ml, vanilla extract
4 large eggs, 200-220g
Preheat oven to 350°F, 180°C, gas mark 4. Spray the sides of an 8-inch springform pan and line with parchment paper. Crush the chocolate wafers until they are fine crumbs. Add in the butter and combine. Pour crumbs in the springform pan and press them evenly on the bottom and up the sides. Chill crust. Heat the chocolate chips, 2 tablespoons water and instant espresso until the chocolate melts. I heated it for 30 seconds on high in my 700 watt microwave. Stir until it’s smooth. Add in the liqueur or water and set aside to cool.
In a large mixing bowl, beat the cream cheese until smooth. Add the sugar and beat until smooth. Add the eggs and vanilla and beat on low until just combined. Add the flour and mix until just combined. Pour out 2 cups of the mixture and refrigerate. Add the melted chocolate mixture to the remaining cheese mixture and mix until just combined. Pour the mixture in to the crust. Place the pan on a baking sheet and into the oven for 30-35 minutes or until the edges begin to set.
Take the reserved 2 cups of cheese mixture out of the refrigerator 10 minutes before you need to use it. Carefully pull out the rack. Pour the reserved mixture around the edges of the cheesecake and smooth to the middle. Continue to bake for 30-50 minutes or until the center is almost set. Do not overbake. Cool for 30 minutes. Remove the sides of the springform pan and cool for 4-24 hours. Remove cheesecake from bottom of the pan to serve.
Laurice: host, director, editor, executive producer
Gilly: assistant host, director of photography, lighting, cat wrangler
Fashion Jewelry provided by: Gems by Gilly
Facebook:
Email: GemsbyGilly@gmail.com
Pieces worn: Raindrops, Pink (earrings)
Follow us on Twitter and Facebook.
Laurice: and
Gilly:
Airport Lounge - Disco Ultralounge by Kevin MacLeod is licensed under a Creative Commons Attribution license (
Source:
Artist:


Chocolate Cheesecake Recipe
Learn how to make chocolate cheesecake. Rich, delicate and super delicious chocolate cheesecake.Printable Version::
More Cake Recipes:
No-Bake Nutella Cheesecake:
Peanut Butter Cheesecake:
Medovik - Russian Honey Cake:
Strawberry Mousse Mirror Glaze Cake:
No-Bake Strawberry Cheesecake:
Tiramisu Cake:
FOLLOW ME:
Instagram:
Facebook:
Website:
Recipe:
Ingredients:
For the crust:
240g (8.5oz) chocolate biscuits/graham crackers
7 tablespoons (100g) butter, melted
For the filling:
325g (11.5oz) dark chocolate 60%
3 cups (675g) cream cheese
1 cup (220g) sour cream
2 tablespoons (15g) cocoa powder
1 teaspoon vanilla extract
1¼ cups (250g) sugar
4 eggs
1/4 teaspoon salt
For the ganache:
150g (5.3oz) dark chocolate 60% (or milk chocolate)
2/3 cup (160ml) heavy cream
1 tablespoon (15g) butter
Directions:
1. Preheat oven to 320F (160C).
2. In a food processor, process biscuits until crumbs are formed. Add melted butter and process again until combined. press into bottom of 9-inch (23 cm) springform pan. Bake for 10 minutes. Let cool while making the filling.
3. Filling: chop the chocolate and place in a heat proof bowl. set over pot with simmering water and melt completely (you can do this step in the microwave: 20 seconds pulses until melted). Set aside.
4. In a large bowl beat cream cheese, sugar, salt and vanilla extract, beat until smooth. And sour cream and beat again until smooth. Add cocoa powder and beat again, scrape the sides of the bowl if needed.
5. Add the eggs, one at the time, beating to combine after each one. add the melted chocolate, mix until combined and smooth.
6. Wrap the bottom of the pan with aluminum foil. Pour the filling over the crust. place in a roasting pan. Place roasting pan in oven. Pour in boiling water to come halfway up side of springform pan
7. Bake for 55-60 minutes, or until center is almost set. Turn off the oven, slightly open the oven door, and allow the cake to cool in the oven for 1 hour. Remove from oven, run a thin knife around the edge of the pan, let cool to room temperature and refrigerate overnight.
8. For the ganache: chop the chocolate, place in a large bowl. In a saucepan bring the heavy cream to a simmer. Pour over the chocolate. Let sit for 1-2 minutes. Stir until smooth. Let cool slightly.
9. Pour over the cheesecake, let set and serve.
If you like me recipes, please join to The Cooking Foodie YouTube membership:
you can get access to special content, behind the scenes photos, videos and more cool stuff!
Hit the JOIN button.
Magical Holiday Desserts ???????? 7 recipes to switch up your dessert game !
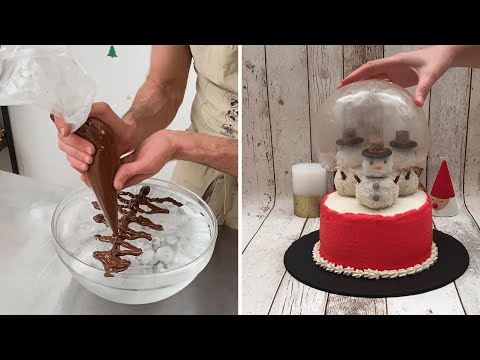
Ho ho ho... Checkout our selection of festive desserts! The secret ingredient: the magic of the holiday season ✨Winter Wonderland Desssert
Santa's Chimney Cake
Snowglobe Cake
4 Easy Christmas Cakes
Find the full recipes, with quantities and step-by-step instructions at
Click here to subscribe to Chefclub ➡️ ⬅️ and turn on notifications ????
►► Chefclub videos :
►► Chefclub store :
FOLLOW US :
Instagram :
Facebook :
Welcome to Chefclub! Our mission is to make you have fun in the kitchen! Our quick, easy and entertaining recipes will help you surprise everyone! Whether you're looking for inspiration for the next lunch with your family, to cook with the kids, to have a drink with your friends, or simple ideas to twist your daily dinners, Chefclub is the right place for you!
Don't forget to subscribe and enable notifications so you don't miss our news!
You can also find all of our full recipes at
#CHEFCLUB #COOKING #RECIPES

La meilleure façon de ... Réussir son cheesecake - 750g
Chef Damien vous dévoile la recette du célèbre cheesecake new-yorkais.A vous de jouer !
La recette par ici :
Ingrédients (pour 4 personnes) :
Pour la base :
200g de biscuit type Lu
100g de beurre fondu
Pour le cheesecake :
600g de Philadelphia ou pâte de ce type
150g de crème fraîche épaisse
120g de sucre
2 œufs
1 gousse de vanille
15g de Fécule de maïs
Préparation :
Concassez les biscuits plus ou moins fin selon vos préférences et ajoutez le beurre fondu
Ajoutez le mélange au fond du moule et tasser légèrement en faisant remonter très légèrement les bords.
Réservez au frais le moule le temps de préparer l'appareil pour figer le beurre et avoir une base bien ferme.
Préchauffez votre four à 160°C.
Dans un saladier mélangez au fouet le fromage type philadelphia avec la crème fraîche épaisse. faut bien mélanger 2 minutes pour homogénéiser.
Ajoutez la gousse de vanille grattée.
Ajoutez le sucre et mélanger pour faire fondre le sucre
Ajouter les œufs, la fécule de maïs.
Mettez l’appareil sur la préparation à base de biscuit.
Lissez la surface (astuce : on peut tapoter le moule pour que ça se répartisse bien) et enfournez pendant 40 minutes environ.
Laissez refroidir 1 à 2 heures avant de démouler. quand on le sort du four ça tremblote mais après refroidissement ça doit être tout dur.
Toutes les recettes et astuces sur 750g.com
---------------
PARTAGE, COMMENTE ET LIKE LA VIDEO !

Café Au Lait with a French Press - HoneysuckleCatering
Bakery vs Homemade MATCHA MOCHI CAKE: Café Au Lait is the perfect drink to enjoy at a French Café!French Cafe Playlist:
SUBSCRIBE to my channel:
INSTAGRAM:
BLOG:
Peach Tarte Tatin:
Croque Monsieur:
French Macarons:
Smoked Turkey Tartine:
Warm Goat Cheese Salad:
*Bonjour Tee in video by Anthropologie:
Bodum French Press:
Coffee Break Series:
Strawberry Matcha Latte:
Thin Mint Frap:
Raspberry Mocha Latte:
Milk Foam 3 Ways:
Salted Caramel Mocha Frappuccino:
Chai Tea Latte:
Vanilla Spice Latte:
Matcha Green Tea Latte:
Eggnog Latte:
Gingerbread Latte:
Winter White Hot Chocolate:
Cafe Au Lait:
Mint Mojito Pour Over:
Dulce De Leche Latte:
Thai Iced Tea:
Peppermint Mocha Smoothie:
Vietnamese Coffee (Cafe Sua Da):
Café Au Lait Recipe (download a recipe card at
Ingredients:
- Freshly Ground (Coarse) Coffee Beans
- Steaming hot, pre-boiled water
- French Press
- Steaming hot Milk
Preparation:
1. Boil 4 cups of water. Once it boils, remove it from heat and let it cool down to about 190ºF or so.
2. Preheat the French Press pitcher and plunger with ½ cup of steaming hot water until everything warms up. Drain.
3. Add 4 tbsp of coffee grounds into the pitcher (1 tbsp of coffee per cup of water).
4. Fill the press half way with the remaining 4 cups of hot water. Let sit for 1 minute to bloom, then stir. Add the remaining water almost to the top of the pitcher. Let sit 3 minutes.
5. Serve with an equal amount of steaming hot milk
(about ½ cup). A Café Au Lait is half coffee and half milk.
Enjoy with the other French Recipes below on this playlist! Au Revoir!
Check out my other French recipes:
Making things Fun, Pretty, and Delicious! Honeysuckle is a lifestyle channel for young adult women interested in entertaining and cooking at home.
© 2015 Honeysuckle Catering. All Rights Reserved. easy recipe by honeysuckle Recipes - Topic
Relevant Articles
-
Cafe Au Lait Blender Cheesecake
Baked Goods -
Cafe Au Lait
Beverages -
Cafe Au Lait Luzianne
Beverages -
Cafe Au Lait Cake
Baked Goods -
Iced Cafe Au Lait
Beverages -
Chocolate Cafe Au Lait Cake
Baked Goods -
Chocolate Amaretto Cheesecake (Make Ahead)
Cake -
How To Make Tofu
Beans and Grains -
Make Their Own Pizza
Main Dish -
How To Make Gravy
Chicken -
Make Ahead Hot Cereal
Breakfasts -
Easy To Make Bars
Candies -
Easy To Make Brownies
Nuts -
POTATO SALAD ALMOST LIKE MOM USED TO MAKE
Salad -
Make Ahead Gazpacho
Mexican -
Make Ahead French Toast
Breakfasts -
Make Ahead Brunch Casserole
Casseroles -
Make Ahead Monkey Bread
Breakfasts -
Make Ahead Sausage Souffle
Main Dish -
Easy To Make Bean Soup
Beans and Grains
Categories
- Appetizers
- Baked Goods
- Barbeque
- Basics
- Beans and Grains
- Beef
- Beverages
- Breads
- Breakfasts
- Cake
- Candies
- Canning and Preserving
- Casseroles
- Cheese
- Chicken
- Chocolate
- Condiments
- Cookies
- Crock Pot
- Desserts
- Duck
- Eggs
- Fruits
- Grains
- Herbs and Spices
- Holiday
- Hot and Spicy
- Jellies and Jams
- Kids
- Lamb
- Liquor
- Main Dish
- Mexican
- Nuts
- Pasta
- Pets
- Quick and Easy
- Recipes for Pets
- Regional Cuisine
- Rice
- Salad
- Sauces
- Sausages
- Seafood
- Side Dish
- Snacks
- Soups
- Stews
- Stuffings
- Sweets and Desserts
- Vegetables
- Vegetarian
- Wild Game